In today's fast-paced digital world, building a brand is no longer a question of flashy billboards or expensive advertisements. It's about being present, being regular, and being authentic—especially on social media. And if you're a business owner, entrepreneur, or content creator, one thing is as obvious as the sun: the video is king.
But let's be real, professional video editing tools are pricey, daunting, or simply too much overkill when you need to make high-quality content regularly. That's where CapCut Desktop saves the day. It's a free, easy-to-use, and surprisingly robust video editor that allows you to make brand-quality content without the need for a team of experts. Tools like text to speech can also enhance your content by giving voice to your visuals without needing a dedicated voice actor.
Here we're charting an end-to-end editing process on CapCut Desktop, so you can rev up your brand with content that's crisp, brand-coherent, and resonates with your audience, whether you're posting on TikTok, Instagram, YouTube, or LinkedIn.
Why CapCut Desktop Video Editor?
Before we get into the workflow, let's address the obvious question: Why CapCut?
CapCut Desktop is the desktop edition of the extremely popular mobile app, but with greater control, greater accuracy, and greater high-end features, all without sacrificing its simplicity. It's perfect for content creators and businesses who need to create quality content in a hurry, without wasting hours mastering complex software.
Here's why it is brand-friendly:
- Professional features such as keyframes, chroma keys, auto-captions, and transitions
- Easy to operate, even for beginners
- Integrated royalty-free music, sound effects, and stock video
- Exports in every common resolution and format.
Now, Let's Dive Into The Actual Workflow—Idea To Upload
Step 1: Plan Your Video Concept
Any successful branded content starts with a strategy. Think of your video as a mini-campaign. What are you trying to accomplish?
- Sell a product
- Share your brand story
- Post customer testimonials?
- Inform your viewers?
- Announce a launch or sale?
- Posting about a sweepstakes?
After establishing the purpose, draft a short script or list of bullet points. Keep it brief, plain, and written in your voice.
Step 2: Gather Footage and Brand Assets
Now, gather all you'll require:
- Recorded clips (from your camera, phone, or screen)
- Product images
- Voiceover or talking-head footage
- Your logo in PNG format
- Brand colors and fonts
- Background noise or sound effects
CapCut allows you to import your fonts and utilize brand color codes, so your content appears the same on all platforms. Get all your media files into your project folder before you launch the app—it will save you time in the long run.
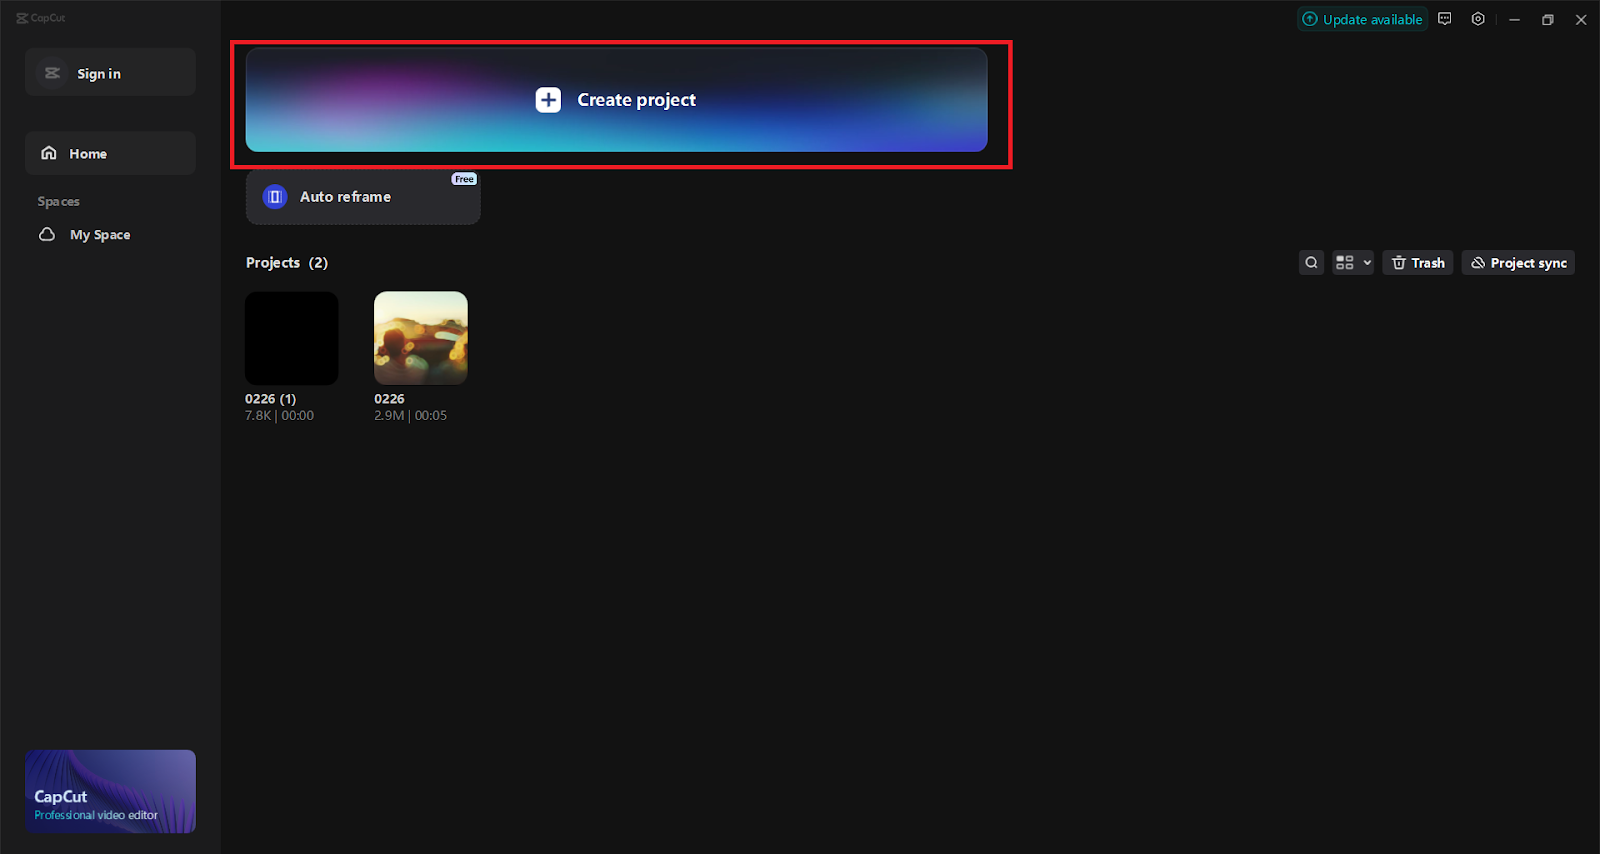
Step 3: Begin a New Project and Use the Correct Format
Open CapCut Desktop, navigate to New Project, and select the correct aspect ratio based on your platform:
9:16 for Instagram Reels, TikTok, YouTube Shorts
1:1 for Instagram Feed
16:9 for YouTube, LinkedIn, or Facebook videos
Drag your primary footage into the timeline to get started. You can also incorporate tools like an AI video generator to quickly create dynamic visual elements or animated content that enhances storytelling.
Step 4: Trim, Cut, and Organize Your Clips
CapCut's timeline editor is simple and minimalistic, so you can dive in:
- Remove any unnatural pauses or fillers
- Use the Split tool (Ctrl + B) to divide your video into smaller pieces
- Read clips to make the story flow smoothly
- Eliminate or mute any excessive background noise
This is the point of constructing the structure of your video: concise, clean, and clear.
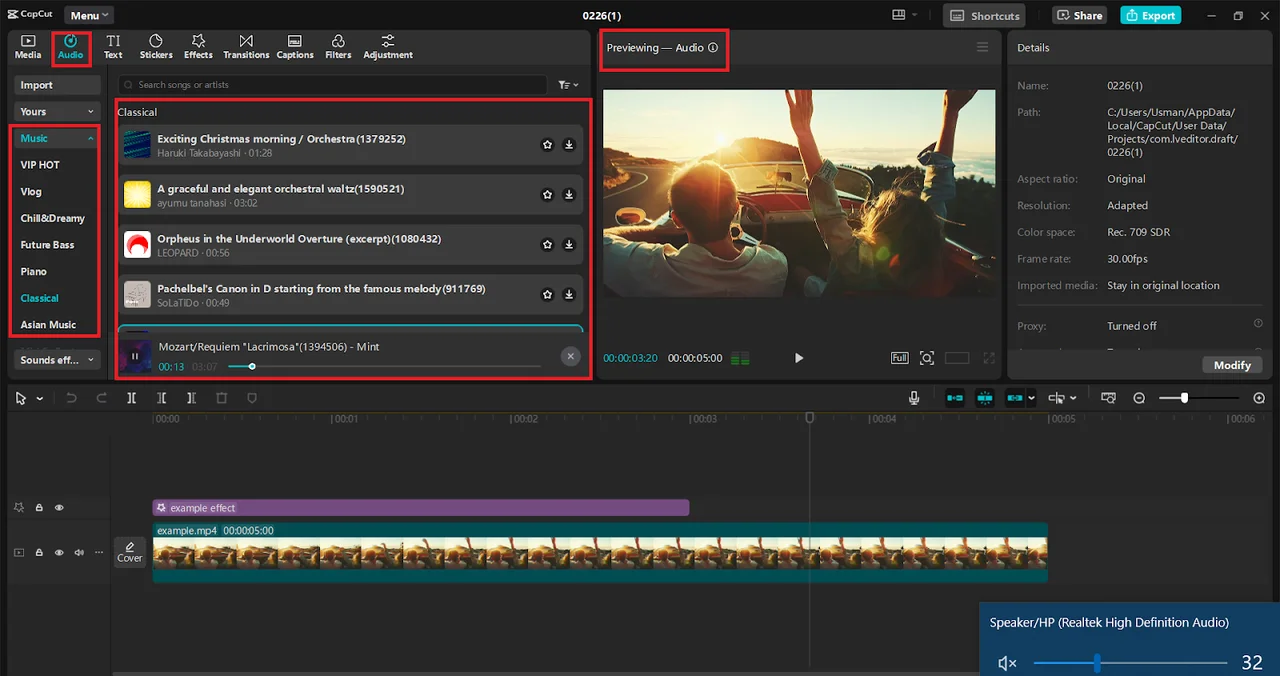
Step 5: Incorporate Music and Sound Design
Tap the Audio tab to access free music and sound effects in CapCut. You can also use your own copyrighted music if you have a branded jingle or particular atmosphere.
- Match the music to your message
- Fast and energetic for product launches
- Casual and evocative for lifestyle or wellness brands
- Quirky and playful behind-the-scenes clips
Balance volume levels such that your music enhances the tale without dominating your voice or visuals. Employ fades, cuts, and timing in sync with the beat.
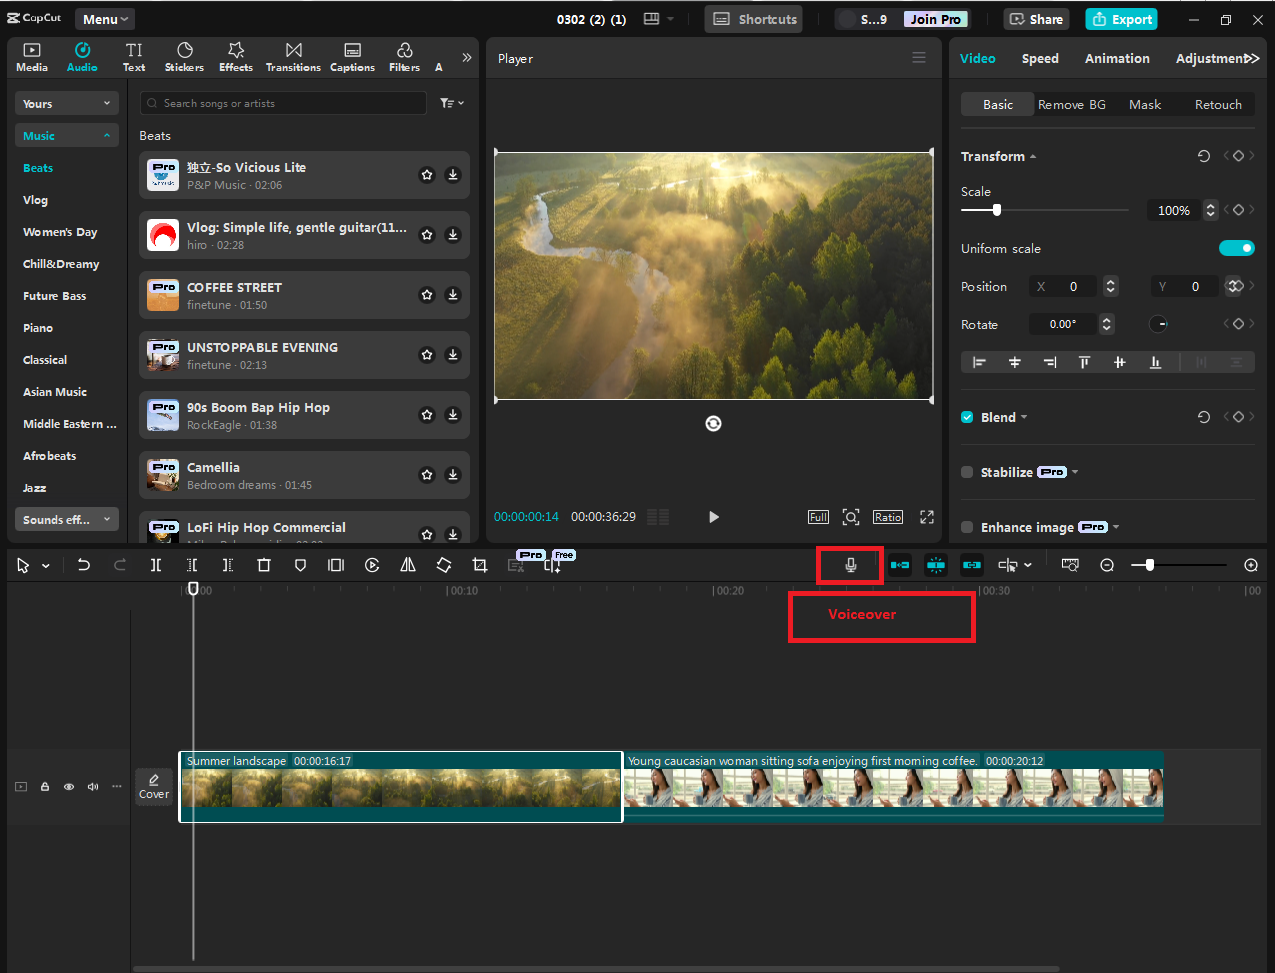
Step 6: Insert Voiceovers and Subtitles
If you're narrating or describing, you can record your voiceover inside CapCut or utilize a pre-recorded track. Utilize the Auto Captions tool to insert subtitles in seconds, particularly helpful if your viewers frequently watch on mute (shocking as this may be). You might also use a voice changer to match different characters or styles, perfect for creative or themed content.
Make sure:
- Your tone is unique and consistent with your branded tone
- Captions are styled in your branded fonts/colors
- Subtitles are properly synchronized and not too quick
- Captions not only enhance engagement but also accessibility, a double benefit.
Step 7: Use Text and Graphics to Reinforce Your Message
CapCut allows you to easily include text, logos, and overlays that reinforce your brand.
Some suggestions:
- Place your logo in the top-right of the video
- Use animated text for product names, prices, or CTAs
- Show on-screen tips or hints
- Emphasize customer reviews or testimonials
You can also define custom fonts, colors, sizes, and animations, and even add your own branded assets. Be style-consistent so that your brand is still recognizable.

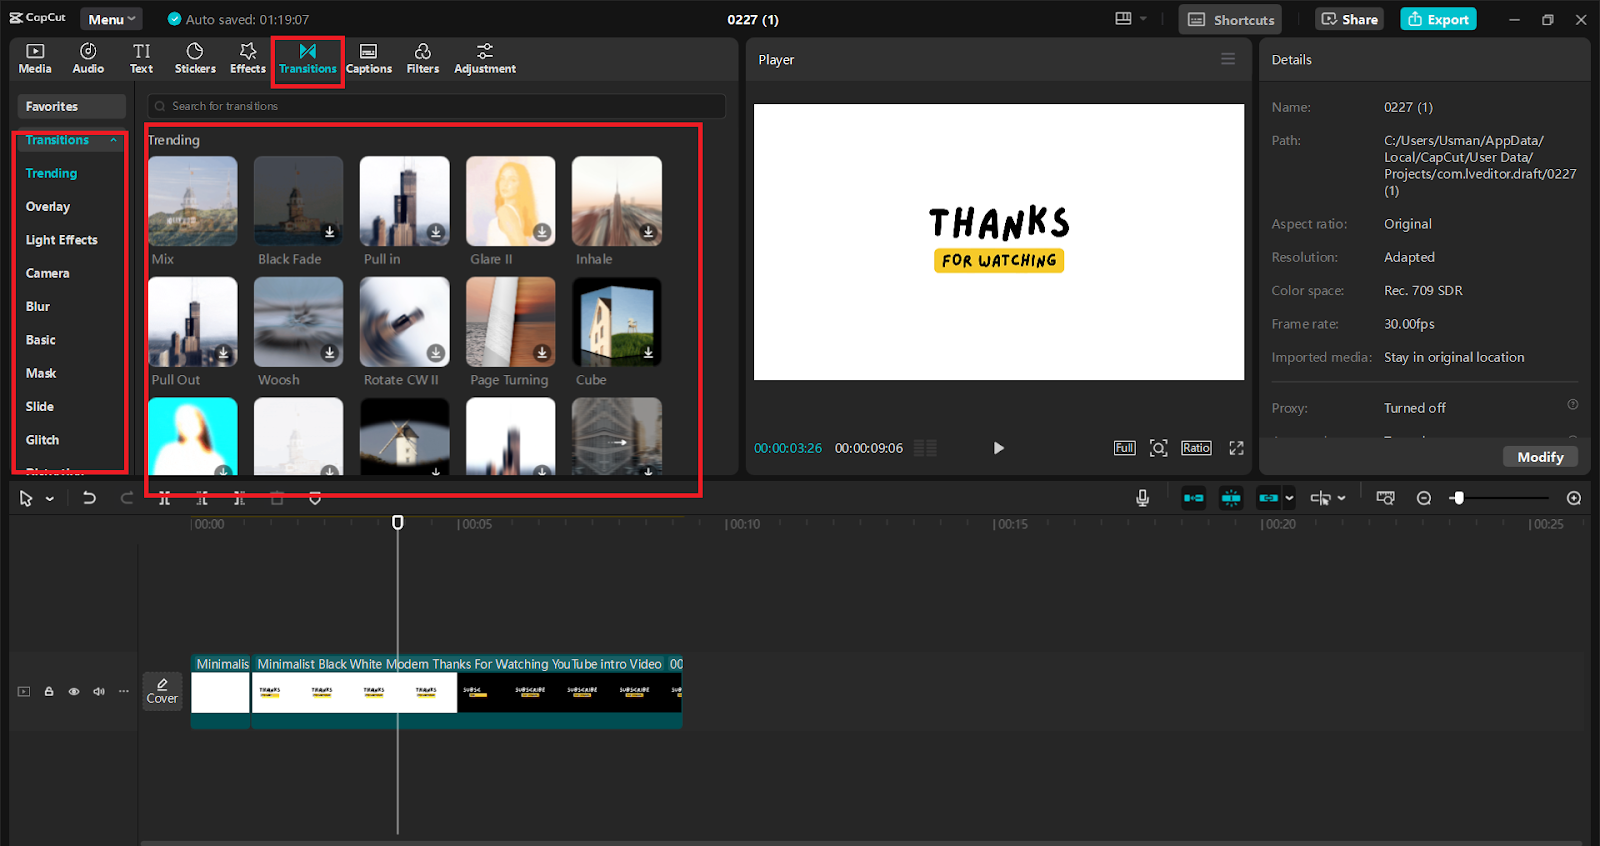
Step 8: Add Filters, Transitions, and Effects
This is where your content gets that final touch. CapCut's Effects tab lets you add visual flair without having things get cheesy.
- Use filters to create an overall unifying color mood (warm, cool, retro, cinematic)
- Include transitions between clips for smooth narration
- Keyframe to animate text or graphics
- Zoom in on product details or highlight text with simple pans
- Less is more in this case—don't overdo it. Keep it stylish, understated, and brand-aligned.
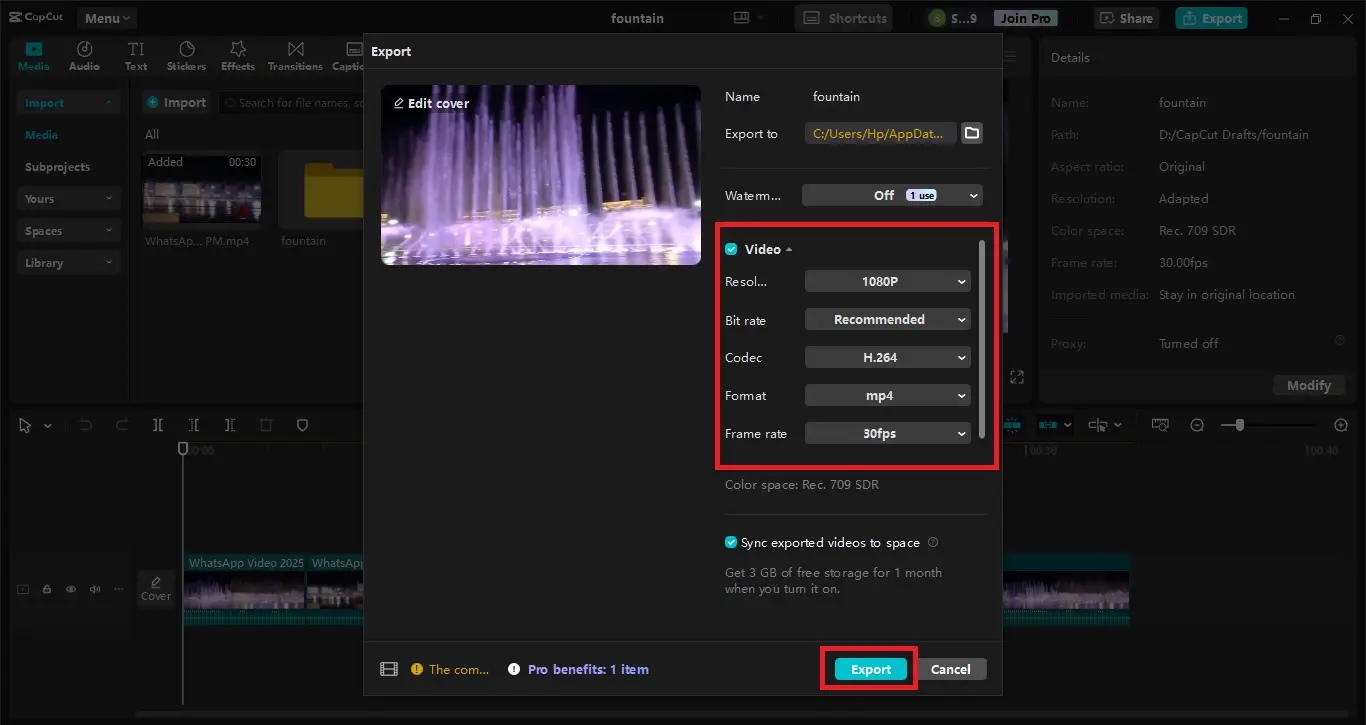
Step 9: Post and Export
Once your video appears refined:
- Click Export
- Select the right resolution (1080p is standard; 4K if you feel like it)
- Tweak your frame rate (30fps is best on most social sites).
- Save your file and select a location to save.